Readers' Choice


Popular articles
With the release of Star Wars: The Force Awakens in December, Jedi costumes should once again become very popular at Halloween and New Year's costume parties. We discussed in detail earlier how and from what to make the costume of a Jedi knight or his young Padawan student. Today we will learn how to easily sew a robe, which for many is one of the integral elements of such a carnival costume. And it doesn’t matter whether you chose the Dark or Light Side, the robe is sewn the same way - only the color is different.


To you will be required:
— Sewing centimeter;
— Fabric (any except too thin and light/flyy, but for more authenticity, you can see the selection tips below);
— Any suitable jacket/tracksuit top with a hood - only as a template;
- Chalk or pointed piece of soap;
— Fabric scissors;
- Sewing machine;
- Pins, a lot;
— Threads in the color of the fabric;
— Iron upon request and necessity.
So, textile: heavy fabric of very fine knitting (in fact, it doesn’t look like knitting; heavy - because the raincoat must stretch and fall in heavy folds from the shoulders), but not very stretchy (otherwise there is a high chance that it will stretch out even after the first wear), a mixture of polyester and drape/curtain material, fleece. Nothing thinly sheer, light (like chiffon) or even too heavy and/or stiff like denim or canvas. Also be sure to wash the fabric before sewing: polyester blends usually don’t need to be washed, but knitted material can shrink a lot after the first wash.
Also, when choosing a fabric, pay attention to the width of the fabric - it can vary greatly - depending on who you are sewing a robe/cloak for - a child or an adult.
IMPORTANT : Be sure to add 1.5 cm seam allowances on all sides of the patterns. In the future, seam allowances will not be mentioned separately in the instructions. And it’s better to immediately cut out the parts a little larger than required, so that when trying on, if anything happens, you have room for maneuver if errors occur. Plus, there will probably be other parts of the suit under the robe, and they also add volume, and quite a bit.
1. Place the future wearer of the cloak/robe in front of you, make him/her stand up straight, and measure the distance from the hairline on the neck to the floor. Add 4 cm to the fold at the floor. Also write down the measurement from the middle of your back to the end of your fingers, and get an idea of the amount of fabric required. You will need 4 of these side parts plus a hood.
2. Fold the fabric in half along its entire length. Now it’s better to turn the sleeves of a purchased jacket inside out to make it easier to outline the armhole. We outline half of the jacket on the fabric, lengthening it according to the obtained height measurement plus 4 cm - and at the same time moving the line slightly at an angle to the side, since the bottom of the robe/cloak should, according to the rules, expand. Under no circumstances should you draw the line exactly vertically downwards, as it will be very difficult to walk in such a raincoat later. And the larger the angle you take, the wider the finished robe will be at the bottom.
.jpg)
And 2.5 cm before you bring the side line to the bottom of the robe, make a square corner and then lower the line vertically down - as shown in the photo above.
3. Cut the piece according to the basting without cutting the vertical fold line of the fabric. This is the back of the cloak.
4. Almost exactly the same way we mark and cut out the pattern for the two front parts of the raincoat - along the jacket or along the already cut out back. Only now we cut the vertical fold of the fabric, since the front parts should be 2 separate. Plus the neckline in the front should be a little lower.

.jpg)
5. We bend the fabric in a similar way, and place the jacket sleeve turned right side out again onto the fabric, including the armhole. Outline the sleeve as shown in the picture below, adding volume in the required places. Don't forget the curve for the armhole at the beginning of the sleeve. Cut out both sleeves.

6. Fold the jacket in half along its entire height, fold the fabric again (now we place the fold at the top) and outline the hood on it, adding volume, as shown in the picture. Plus we measure the length of the neckline (including all bends) on the back of the raincoat, as well as the length of 2 parts of the neckline on the two front parts of the raincoat. Subtract 2 from the result, then divide by 2. This is the width of half the neck of the hood - set it aside on the pattern. Cut out the hood.

The higher the hood, the more it will then fall forward onto the face.
7. We machine sew together the shoulders of the back and two front parts of the raincoat. To sew, fold and pin the pieces front to back. We make a distance from the edges to the seam of 1.2-1.3 cm. After this, it is better to process the edges of the fabric separately above the seam with a zigzag, especially if you have fabric with a very frayed edge.

8. Open the armholes for the sleeves, leaving the back of the coat at the bottom, and lifting the front parts up. Using pins, we alternately pin the armholes with the beginnings of the sleeves, again front to front. First of all, align the center of each sleeve with the shoulder seam. We sew on a machine, having time to remove the pins before they get under the needle.


9. Place the robe/cloak pieces right to front and align the unsewn edges of each sleeve and the side edges of the pieces to the floor. Pin and sew. Zigzag the edges of the fabric as needed.

10. Face to face, pin 2 parts of the hood, sew the back of the hood on a machine, and finish the edges with a zigzag.

11. Right to front, pin the bottom edge of the hood and the collar of the cloak, sew on a machine, and finish the edges with a zigzag.


13. Turn the raw edges of the sleeves inside out at the bottom and pin. Try on the coat and check that the sleeves now end at the same height. Adjust the folded fabric as needed by tucking the edge a little more or less. Sew it too.

14. Finally, fold and stitch around the bottom edge of the cape. Everywhere - the sleeves, hood and converging edges of the front parts, as well as the bottom edge of the cloak - zigzag the edges of the fabric as necessary.
This is what the finished Jedi cloak/robe should look like in the end - in black and brown (dark and light side, respectively). You can also ask the animators to come to the kindergarten for your child’s birthday in just such costumes. It will be very thematic and exciting for children. Happy New Year to you, and happy premiere of the seventh Star Wars!


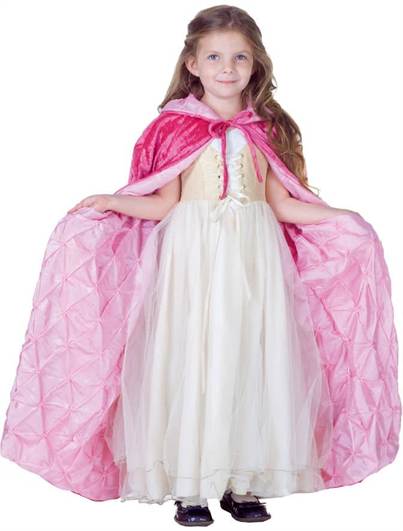
Few New Year's costumes are complete without a cape-cloak; this important detail of the image is found in: the prince, the little red riding hood, Cinderella, the king, the queen, the wizard, all kinds of witches and fairies, oriental beauties, the elf, Batman, Dracula and many other costumes. The options for raincoats can be very diverse: long, short, with a wide variety of collars, without a collar, with a hood, in general, it all depends on your imagination. Today we will look at several examples of how to create a pattern with our own hands and sew a raincoat for a New Year's costume, which is suitable for both boys and girls.
Building pattern 1
To create pattern 1, take two measurements:
Neck circumference – ОШ
Cloak length – Dp
The basic pattern that exists for raincoats is constructed as follows:
1)
2)
3)
We build a second circle with the same center at point O, and the radius is equal to the length of the cloak. OB= Dp
Cutting and sewing according to pattern 1
1)
2)
apply it to the fabric
3)
circle,
4)
leave allowances of 1.5-2 cm,
5)
cut out
6)
we turn up the allowances,
7)
sew on braid and ribbons for ties.
The raincoat according to pattern 1 is ready.
Building pattern 2:
Pattern 2 is constructed similarly to pattern 1, but we take different measurements:
Neck circumference – ОШ
To take the second measurement, you need to spread your arms to the sides and measure the length from hand to hand - Dp2
1)
In the center of the sheet we place a point O.
2)
We build the first circle with a center at point O and a radius equal to half the circumference of the neck. OA=OS:2
3)
We build a second circle with the same center at points O, and the radius is equal to half the length from hand to hand OB = Dn2:2

Cutting and sewing according to pattern 2:
1)
take half of the resulting circle,
2)
fold the fabric in half, right side inward
3)
We attach the received semicircle pattern to the fold
4)
Let's circle
5)
leave an allowance for processing the edge and neck
6)
cut out
7)
Processing the edge
8)
Now the head will not fit into the neck, it is necessary to make a cut so that the head fits freely
9)
we process the neckline and sew on the ties.
Building pattern 3:
This method is very simple. You need to take a piece of fabric equal in length to the length of your raincoat plus 6 cm for an allowance (4 cm at the top and 2 cm at the bottom), about a meter wide. Fold the fabric in half and cut the lower right corner as shown in the figure (draw a bisector 2-3 cm long and smoothly connect this point to the sides).

Sewing according to pattern 3:
1)
Fold the top so that the lace can be inserted.
2)
Insert the lace and pull it to the required length, fix the lace. You don’t have to fix it, but for small children it’s better to adjust it right away so that nothing gets in the way at the party, that is, the raincoat may come undone or the lace will fly out, which will be unpleasant.

3) I sewed buttons to the raincoat and jacket so as not to leave any chance for trouble. With this fastening, the raincoat does not come off, does not fall off and always looks as intended.

4)
Now we fold the edges and sew on the braid.
5)
For the effect that the raincoat still has ties, we sew on tassels.

Here is a photo of a raincoat from the holiday, although the quality is not very good, the main idea is clear.

All these models of raincoats may well have a collar or a hood.
Using the main pattern from the article, you can model the collar you need.


We build the hood as follows:
To create a pattern for the base of the hood, we will need to take just one head circumference measurement; see how to take it correctly in this article.
For example, your girth is 54 cm, then OG = 54 cm.
1)
We build a rectangle ABCD, where AB=DC=OG:2 (54:2=27) and AD=BC=OG:2+6 (54:2+6=33)
2)
Divide side AD into 4 equal parts (33:4=8.2), mark division points a,b,c.
3)
Divide side BC into 2 equal parts (33:2=16.2), mark the division point.
4)
From the division point, on the BC side, to the left we restore a perpendicular of 1.5 cm
5)
Connect points B with a smooth line; 1.5 and C
6)
From point D, move 3 cm to the right
7)
Connect the points with a smooth line: 3,a,b,c,1
At your discretion, you can make grooves or gather the bottom of the hood. You can also add a little height to the finished pattern, then the hood will be looser, it all depends on the model of the suit.
A cape may be required as an addition to a fashionable outfit or a carnival costume. This is a fairly simple piece of clothing that has been used for centuries for warmth, to indicate status, or simply for beauty. The cape looks equally good on both fairy-tale characters and catwalk models. This article will teach you how to make several simple capes in different styles.
Choose your fabric. The following types of fabrics are good choices: cotton, flannel, satin and wool. You will need a main fabric for the outside of the cape and a lighter fabric for the lining. These can be fabrics of the same color scheme with the same pattern or contrasting fabrics.
Measure the circumference of your neck and determine the desired length of the cape. Measure the circumference of your neck at the base. Then measure from the shoulder down to the intended edge of the cape. Write down both measurements.
Use your neck circumference to calculate your radius. Take a calculator and divide your neck circumference by 2. Divide the result by Pi, or 3.14. Round your answer up to the nearest whole number or five-tenths number. This will be your radius.
Fold the main fabric into four layers. Start by folding the fabric in half crosswise. Fold the fabric in half again (again crosswise) to form a square. Unfold the fabric so that the corner with the center point of the folded fabric is at the top left. Do not fold the lining fabric yet.
Draw a neck line on the fabric. Pin a piece of twine to the upper left corner of the folded fabric (to the center of the fabric itself). Tie a tailor's chalk or marker to the other end of the string at a radius length distance. Use the resulting design as a compass to draw an arc from the top edge of the folded fabric to its left edge.
Draw a line for the bottom of the cape. Add the desired cape length to the radius. Extend the string with chalk or marker to the obtained value. Draw a second arc on the fabric, which will mark the bottom of the cape.
Cut out the fabric cape using a seam allowance of about 1.3 cm. When you have completed this work, fold the lining fabric in four layers in the same way, and then place the cut and still folded outer fabric on top of it. Cut out the lining using the outer piece as a guide.
Make a front slit on the cape. Unfold the main and lining fabric pieces, and then layer them on top of each other. After that, fold them in half to make a semicircle (more precisely, half a donut). Cut both layers of fabric along one of the folds (for example, along the left). Don't touch the second fold. Now you have the front cut of the cape ready.
Fold and pin the pieces right sides together. Unfold the folded semicircles. Place the pieces one on top of the other with right sides facing inward. Check the accuracy of the alignment of all the cuts, and then start cutting the parts together.
Consider sewing ties to the cape. Take two long pieces of tape (about 75cm each). Remove the pins from the top corners of the front cut. Push the ribbons inside the open corners of the cape. Be sure to line up the edges of the ribbon pieces with the cut edges of the cape, and then pin the corners of the cape again. The ribbons should lie in a layer between the two parts of the cape itself.
Sew a stitch around the perimeter of the cape with a 1.3 cm seam allowance. You should sew around the neckline, hem, and both straight edges of the cut. Leave an unstitched section of about 10 cm in length at the bottom of one of the straight sides of the cape, so that you can then turn the product right side out. To make the stitching more secure, do not forget to make bartacks at the very beginning and at the end.
Make notches in the seam allowances along the curved edges of the product, and also cut off excess fabric from the corners. Along the neck line, make notches on the seam allowances at a distance of about 2.5 cm from each other. Make notches along the bottom edge of the cape at a distance of 2.5-5 cm from each other. Finally, cut the seam allowances at the top and bottom corners of the front slit of the cape at a 45-degree angle. Thanks to this step, the inside-out cape will be more even and neat.
Turn the cape right side out and then iron it. To straighten the corners, use a blunt, pointed object (such as a knitting needle). Fold the raw edges of the opening through which you turned the cape inside so that they lie uniformly with all the other edges of the cape, and then pin them together. Iron the cape.
Sew up the turning hole. This can be done by hand using a hidden step stitch. You can also simply stitch to the edge (at a distance of 3 mm from the edge) the entire perimeter of the cape with threads to match the fabric. When finished, remove the pins.
Attach a clasp to the cape (if you haven't already done so). You can sew a buckle, a hook and loop, or even a braided cord fastener onto the cape. Choose for yourself what will best match the style of the cape itself.
Cut out the hood so that its height is 45 cm. Take a 55 cm wide rectangle of fabric previously cut from the main fabric. Turn it so that the folded edge faces your direction. Measure from this edge to a height of 45 cm and cut out a piece measuring 45x55 cm (folded). Make sure that the part has a fold along one of its 55 cm long sides. Remove the cut pieces of fabric; you won't need them.
If necessary, trim the main fabric of the cape. The previously set aside large piece of fabric will be used to make the cape itself. Measure its length along the side with the longitudinal fold. If the length is longer than required, cut the fabric to the desired length. Don't forget to add 5cm for seam allowances.
Hem the raw edges of the cape. Unfold the main fabric and place it with the wrong side facing you. Fold one transverse edge under 1.3 cm and press the fold with an iron. Fold this edge in 1/2 inch again and press again. Place a hem 3mm from the first fold. Repeat this step with the two sides of the fabric.
Lay out the hood piece and hem one of the long sides on it. First, lay out the hood piece and turn it with the wrong side facing you. Hem one of the 90 cm long sides in the same way as you did with the cape. Do not touch the remaining three sections of the part for now.
Fold the hood and stitch the back seam. Fold the hood piece in half again, wrong side out. The fold will go in the same place as before (along one of the sides, which was 55 cm long before hemming). The height of the folded part will again be 45 cm, while on one edge the cuts will be finished with a hem stitch. Sew the raw edges of the fabric along the other 45cm length using a 1.3cm seam allowance.
Place two stitches along the top edge of the cape to assemble it. Sew straight machine or hand basting stitches along the top edge of the cape. The first line should go 7 mm from the raw cut of the fabric, and the second line should go 1.3 cm from it.
Gather the top of the cape to match the bottom edge of the hood. Locate the ends of the bobbin threads along both edges of the cape. Grab them firmly and start pulling. Continue gathering the fabric until it is the same width as the bottom of the hood (which will be about 51cm when folded in half). Tie the ends of the threads in a knot and trim off the excess.
Sew the hood to the cape. Pin the hood and cape together with right sides facing inward. Make sure that the open edge of the hood is aligned evenly with the gathered open edge of the cape. Sew the two parts together using a 2.5 cm seam allowance. Make sure that the fabric does not tuck or bunch up when you sew the gather stitches.
Add a buckle or clasp. You can be creative in this matter. The front of the cape can be decorated with a simple sewn-on woven clasp. Instead of a clasp, you can sew ribbon ties (if you prefer to tie your cape securely). Another option would be a loop of cord on one side and a large button on the other.
Add additional touches (at your discretion). At this stage, the cape can be considered ready, or you can additionally decorate it with something to make it more sophisticated. Below are some starting ideas.
Choose your fabric. Since you won't be sewing this cape, it's best to choose a fabric that won't fray, such as felt or flannel. In total you will need about 90 cm of fabric.
Fold the fabric in half lengthwise. Position the resulting rectangle so that one of its narrow sides faces you.
Draw the side edges of the cape. Use a tailor's chalk or marker to make a mark along the bottom edge of the fabric, 28cm from the fold. The depth of the mark can be adjusted at your discretion. The closer it is to the bottom edge of the fabric, the longer the cape will be. Place a second mark at the top edge of the fabric, 14cm from the fold. Connect the two marks along the ruler.
Use a plate or bowl to draw the outline of the neckline. Find a plate or bowl with a diameter of 20 cm. Attach it to the upper corner with a fold so that from the side of the fold the plate protrudes sideways beyond the fabric by 10 cm, and from the side of the upper edge creeps onto the fabric by 14 cm. Transfer the contours of the plate onto the fabric using tailor's chalk or marker.
Cut out the fabric along the drawn lines. Try to cut the fabric along the inside of the lines so that there are no traces of chalk or marker left on the finished cape. You can leave the cape cut as is, or try modifying it according to one of the ideas below to increase your character choice.
Add Velcro fastener. Buy ready-made square Velcro fasteners or cut them yourself from Velcro tape. Using hot glue or textile glue, glue the fastener halves to the corresponding “tendrils” on the top edge of the cape. One half of the fastener should be glued to the front side of one tendril of the cape, and the second - to the wrong side of the other. Be aware that self-adhesive Velcro fasteners are also available for sale.
Consider adding an emblem appliqué to your cape. superhero . Glue the thermal film onto a piece of fabric in a contrasting color. Draw a superhero emblem on it and then cut it out. Pin the emblem to the back of the cape. Iron it and then remove the pins.
Choose your fabric. Since you won't be sewing this cape, it's best to choose a fabric that won't fray, such as felt or flannel. Jersey, linen knitwear or tulle are also a good choice.
Cut the fabric to the required length. Measure the distance from the base of the child's neck to the intended edge of the cape. Add an additional 5-7.5 cm to the measurement. Cut a piece of fabric to the appropriate length. The width of the cape can be whatever you wish.
Little Red Riding Hood or Witch?
A cloak or cape with a hood is an attribute of many fairy-tale characters. With it you can try on the image of both a red riding hood and a sorceress, witch, or magician. After all, sometimes even adults want to dream like a child and find themselves in a fairy tale... Thanks to photographer Galina Karatsyube for a wonderful photo shoot in which I felt like a fairy-tale character transported to a winter fairy tale.
The sewing principle may be the same, but differ in color or finishing.
As for the fabric, I opted for satin, it’s inexpensive, looks bright and elegant, especially in photographs (the only drawback is that it wrinkles). Taffeta looks the most impressive, but it is also more expensive.

The pattern of the raincoat can be adjusted depending on the desired length. The width of the fabric in stores is mainly 1.4 m and 1.5 m (I have two pieces of fabric 1.5 m wide and 4 m long). I sewed a reversible raincoat, designed for tall people. I cut it according to my own pattern, based on the size of the fabric:

We cut each section in half and sew it together (the dotted line means “Sew” in the drawing), we get two parts three meters wide. Cut it out as shown in the drawing. Using an iron, we glue the necks of the parts with non-woven material to prevent the collar from stretching.

We sew everything together along the edge (front side to front side) except the neckline. Turn it inside out and sew a finishing stitch along the edge to secure it. The double-sided cape is ready, let's move on to the hood.

It is relatively large; in films, all sorts of sorcerers and magicians usually wear such hoods.

I think that the most interesting thing about a raincoat is the hood (I haven’t found such a sewing method on the Internet yet). The method is convenient in that the hood can be sewn without a pattern, relying only on scraps after sewing the cape.
From the “triangle scraps” that remained after cutting out the details of the cape we will sew the hood.
First we sew red with red and black with black (line 1 in the photo below). Then connect the red and black parts along line 2. We slightly round (cut) along line 3.


We gather the hood along line 3 to a size equal to the neck of the cape. Line 3 is the line along which the hood is sewn to the cape. Thanks to this design, the hood is ideally shaped, i.e. voluminous at the back and sides.

Sew on the satin ribbon ties and the reversible cloak is ready!


Create with your own hands and everything will work out!
Currently, capes with a hood and ponchos with sleeves are extremely popular. This becomes mainly visible in winter and autumn, when the temperature outside drops and it becomes cold. In such weather, a warm cloak with a hood can save you, the pattern of which is very simple, so even a novice needlewoman can create it for herself. And most importantly, such a thing will look great on any woman, regardless of age and body type.
To create a cape with a hood with your own hands you will need:
When everything you need is at hand, you can begin work, which consists of several phases:
It’s easy to sew a cape yourself; to do this you need to be patient and be as careful as possible. And the end result will be an extraordinary, unique and fashionable wardrobe item.
The poncho consists of several parts, the main part consists of the front, back and neck. Both sleeves are sewn into this part. The details of the product should be sewn together as carefully and concentratedly as possible, checking the sample. And the last thing is decorating the resulting product with various elements, for example, tassels, pom-poms or fringe.

You need to start making a poncho from the main part, namely the front and back. Then the sleeves are created and the neckline is processed. And only after this the sleeves are sewn on. For a summer model, you can make the product sleeveless.
For the cold season, thicker and waterproof fabrics should be used. You can treat the selected material with a special water-repellent impregnation. And for the warm season, the fabric should be light. We choose the length to taste, taking as a rule that the longer the product, the warmer it is. The presence and shape of the hood also depends only on desire.
On a note! If you want, you can make a detachable hood with a zipper.
To make a cape with a hood look as beautiful as in the picture, you need to consider the following tips:

The popularity of this item is explained by the fact that it provides excellent protection in windy and cold weather. And also because walking in a poncho raincoat is very comfortable, it suits a girl with any body type.
Let's look at another way to sew a stylish new thing:
The first method: fold the two parts with the front sides inward, stitch and finish with bias tape. Second method: fold the back sides inward, stitch along the front side, turn it inside out and sew a little wider to hide the previous seam and prevent threads from spilling out.


If the New Year is coming, it’s time for Christmas trees and costume parties, then you can sew a raincoat with a hood. This New Year's costume will look very unusual, but it is very easy to make. Below are some ideas for such images:


| Related articles: | |
|
Trench collars for newborns
Sustaining a cervical spine injury requires... A simple pattern: a cape with a hood, made by yourself Sew a black cloak
Thanks to the release of the seventh installment of Star Wars:... Crochet amigurumi dogs of all breeds: how to crochet correctly according to patterns with photos and videos
With the advent of small children in the family, many needlewomen begin... | |


